Building an application
IDE
Once you have completed coding your mobile app and tested it using our Mowbly test app you can build your application using our build UI. Through this you can create your own application with a configurable application name, icon and splash for Android, iOS, BlackBerry and Windows Mobile. To reach the build UI open the pack which you have tested thoroughly and click on the Build button present in the pack toolbar.
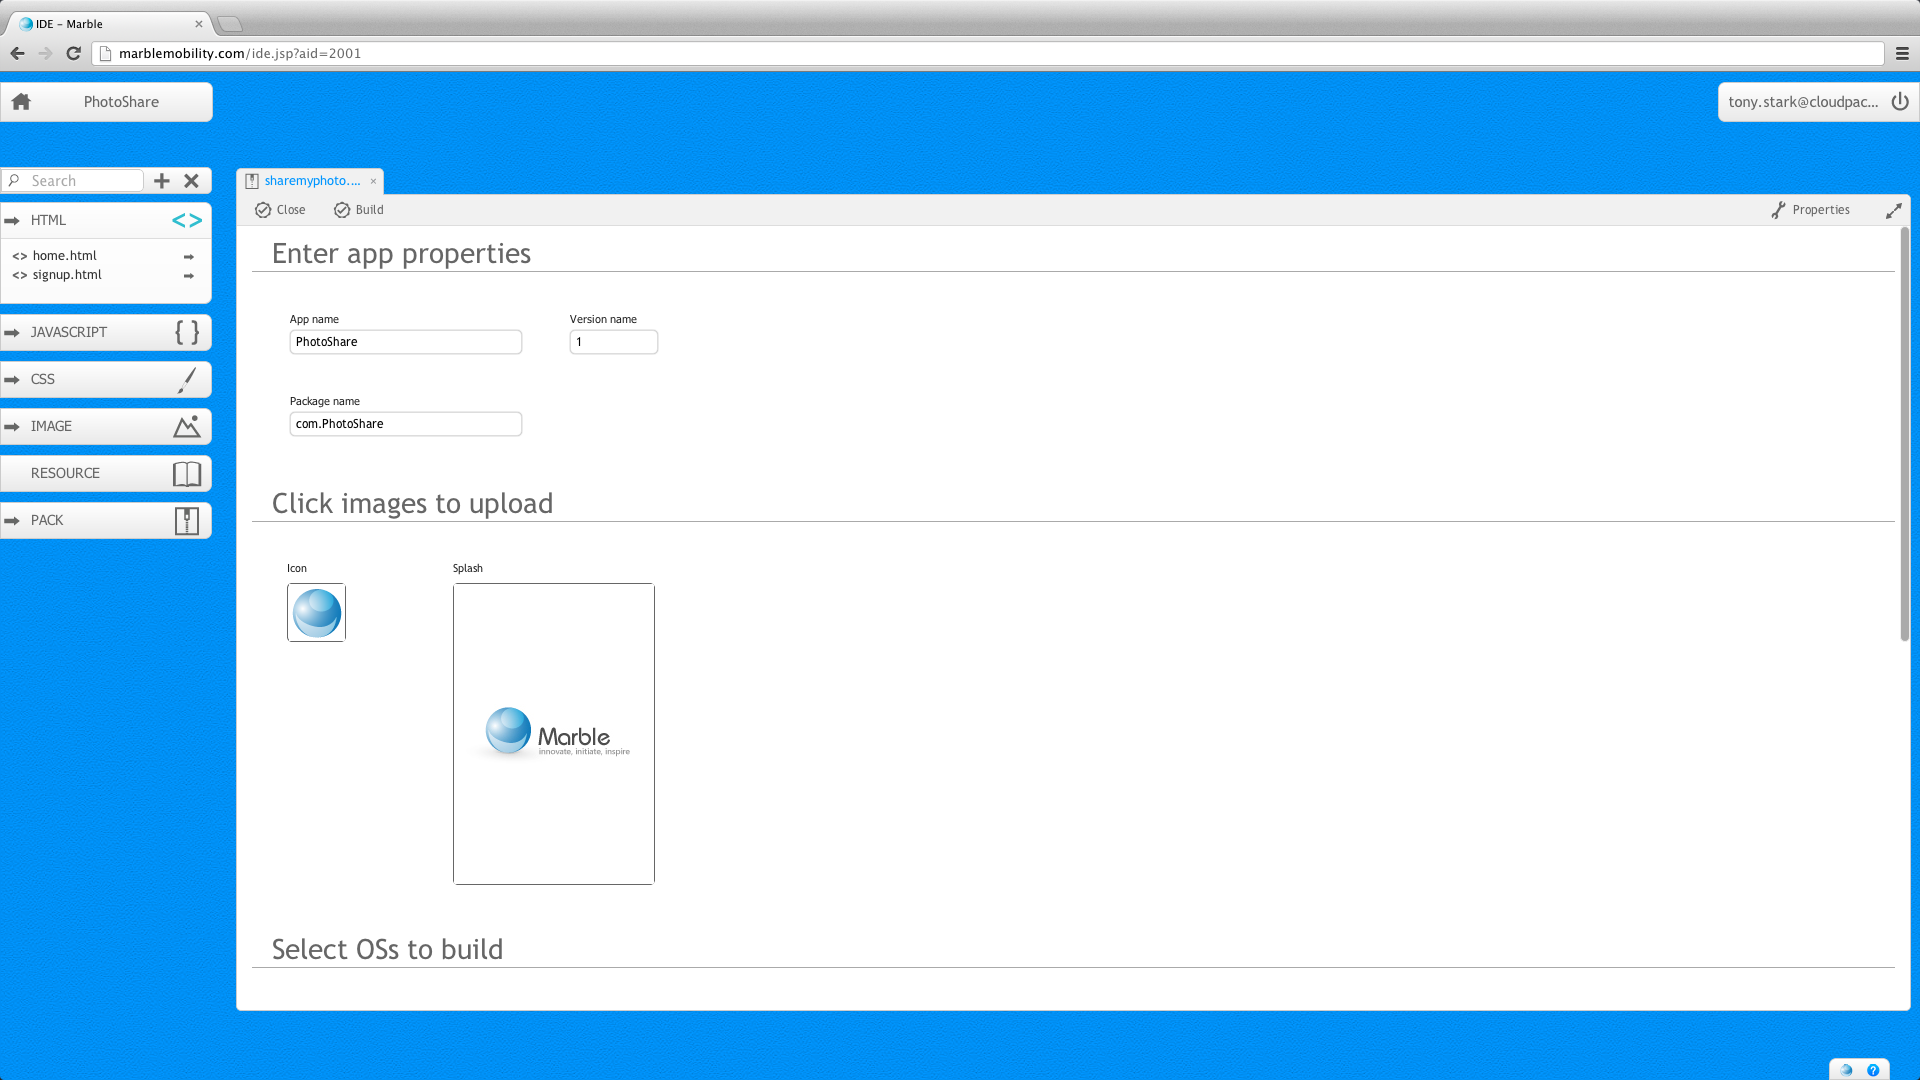
Fig 1 : Build UI
App Properties
App properties contains the following:
- App name
Text box to mention the mobile application name. This is the name which you would see on your mobile in the home screen.
- Version name
Text box to mention the version of your mobile app. This is the version which you would see in the mobile app store.
- Package name
Text box to uniquely identify your mobile app. Recommended usage is to provide reverse domain name. eg. com.PhotoShare
Click images to upload
You can enter your default app icon and splash image here. Mowbly already provides you with default images for your application, but you can customize these images but clicking on them and uploading your new ones.
Select OSs to build
You can select the OSs for which you want to build your app here. In the below image we have enabled build for iOS which is shown highlighted. This UI also shows you the various build modes under which the build will be created. Below we are creating a build for iOS in Adhoc build.
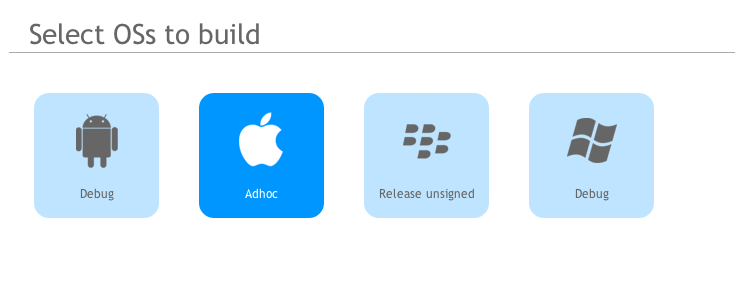
Fig 2 : Select the OSs to build
Build Configuration
The build configuration for various OSs allows you to mention the build mode of your app and also provide certain signing properties if required for your app. It also contains the UI for fine tuning your application icons. You can specifically add certain icons for your app as suggested by the OSs documentation. The UI already contains all the images, clicking on a particular image allows you to update that icon by clicking on it and updating the icon.
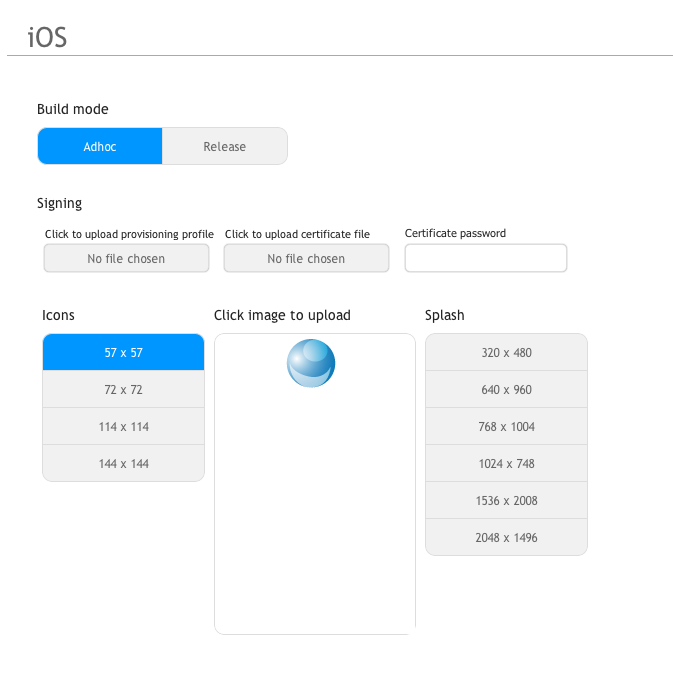
Fig 3 : iOS Build Configuration
Once you have entered all the required parameters for building your app, you can click on the Build icon on the toolbar to issue requests for building your application. You can check the status of the build requests in the Build History UI which is described below. Once your app has been built you will receive an email providing steps to installing the app on your mobile device.
Build History
You can reach the Build History by clicking on the Build History button present on the Pack Toolbar. On clicking of this button you are presented with the Build History UI, which shows you the status of various build requests issued by you for that particular pack.
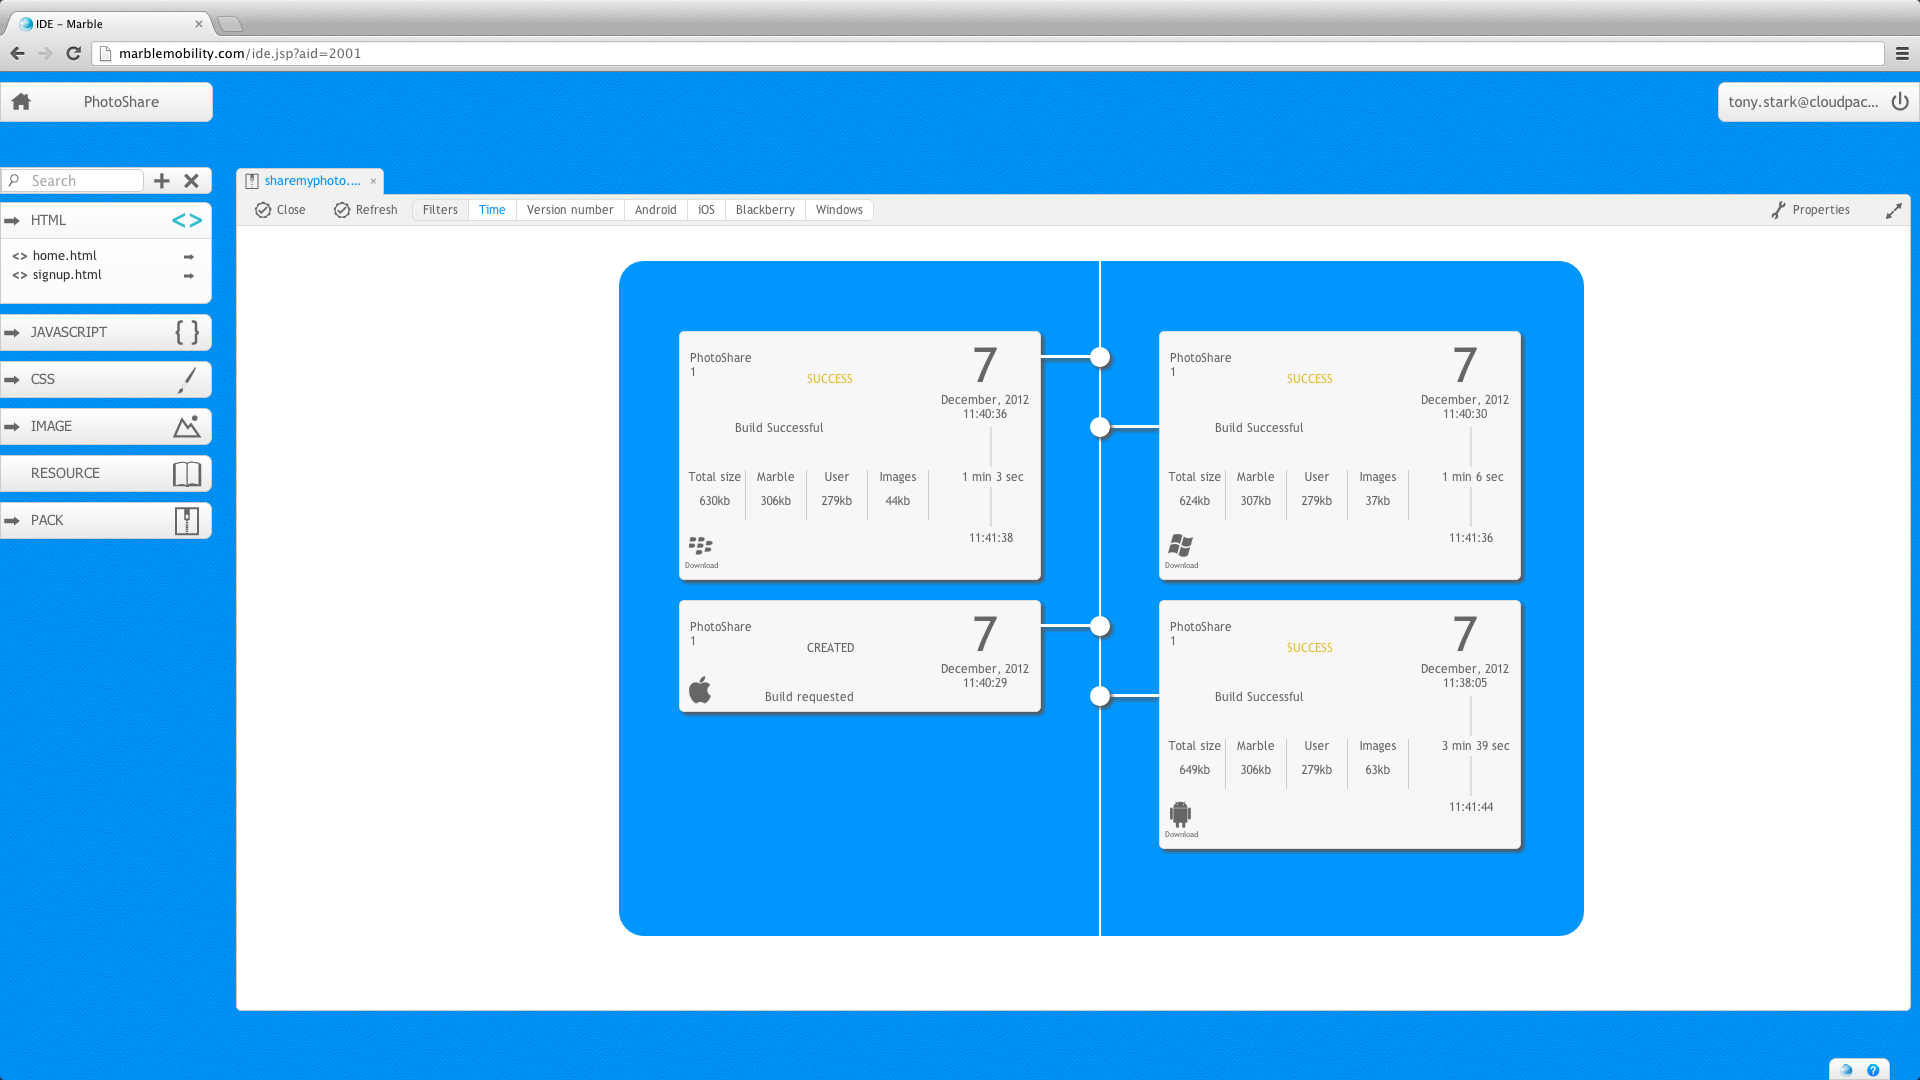
Fig 4 : Build History
As you can see in the image above the build history contains 4 build requests which we had provided before. Three of the build requests have been completed and their status is now mentioned as Success. One of them is created which indicates that it has not yet been picked up by Mowbly Build Servers. The build histories depicted here are shown in chronological order, but you can filter them based on the following filters as shown in the image below.
![]()
Fig 5 :Build History toolbar
In the above image we have filter the UI based on time, but we can change the filter to any other value just by clicking on it. The toolbar also has a refresh button to refresh the UI and check whether the builds have changed their status.